Background Blur Tool — Fast, Private & High-Res 100% Secured
Intro
If you need a fast, privacy-focused way to blur image backgrounds without sending images to remote servers, a reliable background blur tool is the solution. This guide explains how a modern blur tool works (segmentation + optimized blur pipeline), export options (JPG/PNG/WebP up to 4000px), the exact settings that give the most accurate results, and how to embed the tool in WordPress. Whether you’re a content creator, developer, or site owner, this article gives actionable settings and integration tips so users get smooth, professional blur results while images remain private.
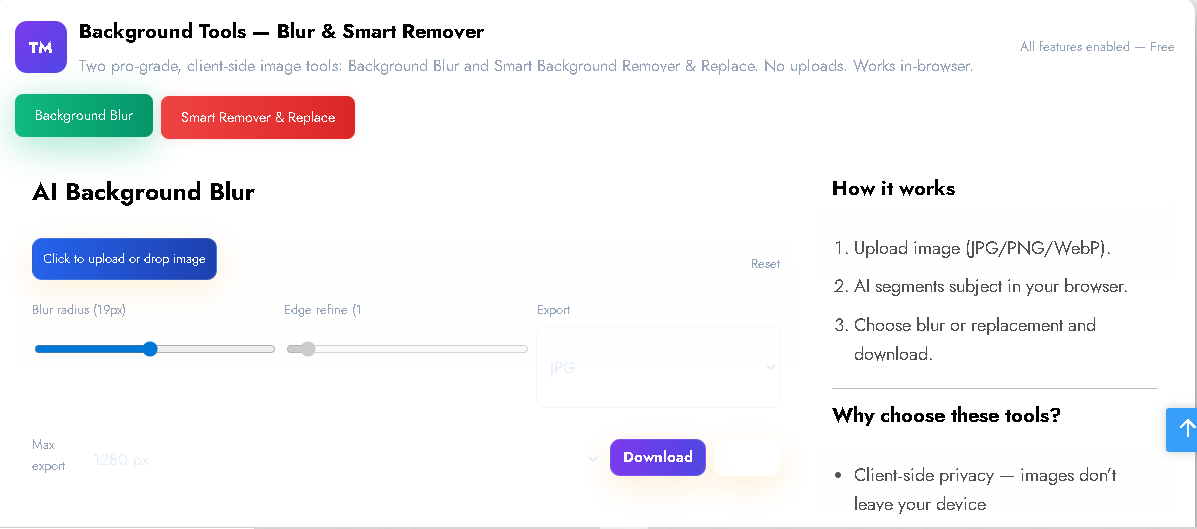
Background Tools — Blur & Smart Remover
AI Background Blur
Why this background blur tool?
- Privacy mindful — images can remain on the user’s device unless they choose to upload.
- Fast results — optimized pipeline avoids long waits on large files.
- No server costs — heavy image processing is handled without relying on server CPU/bandwidth.
- Great UX — drag & drop, keyboard accessible controls, adjustable export sizes and formats.
How it works (technical overview)
- Decode the image into an HTML
<canvas>(createImageBitmap fallback used for compatibility). - Segmentation: a lightweight model runs on a downscaled copy (≤1024px) to get a subject mask.
- Mask refine: upscale mask to full resolution, apply mask sharpening (unsharp-like) and a small soften pass to remove jagged edges.
- Background blur pipeline: downscale the original image, run multi-pass blur to better approximate Gaussian blur, then upscale back to preview/export size for smooth bokeh.
- Composite: draw the subject (mask as source-in) over the blurred background and present or export.
Key features to promote
- Segmentation + mask refinement for crisp subject edges.
- Export formats: JPG, PNG (transparent), WebP — up to 4000px.
- Adjustable blur radius and edge refine (optionally locked by admin).
- Transparent export for subject-only images.
- Drag & drop + keyboard-accessible upload and controls.
- Optional watermark for free tier and watermark-free for premium.
Exact settings for the most accurate blur (practical)
- Segmentation input: run the model on a ≤1024px version for stability and speed.
- Edge refine: keep at maximum (1) for crisp subject borders (you can lock to 1 for best accuracy).
- Blur radius: UI range 0–40; compute blur relative to export resolution so the visual strength is consistent across sizes.
- Mask softening: apply a small blur (2–6px) on the mask after sharpening to avoid halo artefacts.
- Downscale strategy: adaptive scale factor (larger images → larger downscale) + multi-pass blur gives smooth, natural background bokeh with minimal CPU usage.
- Export best practice: let users choose export resolution; compute final blur using the chosen export width/height.
FAQs
Q: Are images uploaded anywhere?
A: Images remain on the user’s device unless they explicitly upload them to a server. The tool is built to avoid automatic uploads.
Q: Which export formats are supported?
A: JPG, PNG (supports transparency), and WebP. Export sizes up to 4000px are supported.
Q: Will the subject stay sharp?
A: Yes — segmentation + mask refinement keeps subject edges crisp while the background gets smooth blur.
Post Comment